Clip Studio Paint Animation: Clip Studio Paint Animation Coloring
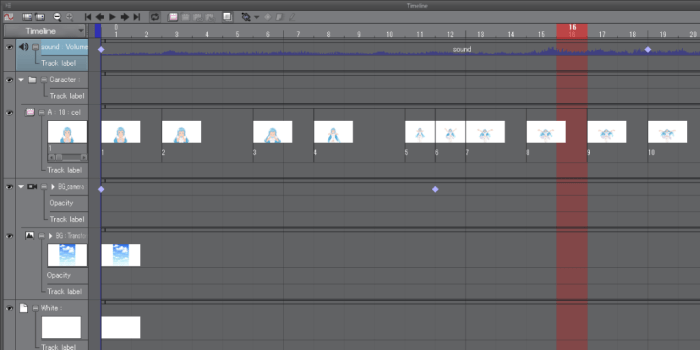
Clip studio paint animation coloring – Clip Studio Paint offers a robust set of tools for animating, and its coloring capabilities are particularly noteworthy for their flexibility and precision. This exploration delves into various coloring techniques, layer management strategies, palette creation, and a streamlined workflow for efficient animation coloring.
Clip Studio Paint offers robust animation coloring tools, perfect for bringing your characters to life. For a deeper understanding of anime and manga coloring techniques, you might find the anime & manga digital coloring guide pdf helpful. This guide complements Clip Studio Paint’s features, providing additional insights into achieving vibrant and expressive colors in your animations.
Coloring Methods in Clip Studio Paint Animation
Clip Studio Paint provides several coloring methods suitable for different animation styles. The choice depends on the desired aesthetic and workflow efficiency. Cel shading, a popular technique in animation, is often implemented using these methods.
- Fill Tool: This is the most straightforward method for quickly filling in large areas of color. Its strength lies in speed and simplicity, making it ideal for base coloring. However, it lacks precision for complex shapes and requires careful attention to avoid overflowing line art.
- Airbrush: The airbrush offers soft, blended edges, perfect for creating smooth gradients and subtle shading. It’s excellent for achieving a more realistic or painterly look, but can be time-consuming for large areas and requires skill to control the opacity and flow for consistent results. A soft airbrush can be used to create smooth transitions between colors in a cell-shaded style, giving a slightly less harsh edge than a flat fill.
- Pen Tools (with color): These offer precise control, allowing for detailed coloring and shading. They are well-suited for intricate designs and adding highlights or shadows with careful line work. Using a pen tool to add subtle color variations within a cell-shaded area can add depth and visual interest. For example, a darker shade of the base color could be used to indicate a shadow in a crease.
- Gradient Tool: This tool is perfect for creating smooth color transitions, particularly useful for shading and highlighting. It can quickly create a gradient from light to dark within a cell shaded area to suggest form.
Layer and Layer Mask Usage for Efficient Coloring
Effective layer management is crucial for a streamlined animation workflow. Separating line art and color layers allows for independent adjustments and corrections without affecting other elements. Layer masks provide further control, enabling precise color application and editing.
- Creating a Clean Line Art Layer: Start by creating a new layer and carefully draw your line art using a pen tool. Ensure clean lines and avoid overlapping strokes for easier coloring. Consider using vector layers for line art, allowing for easy scaling and editing later.
- Creating a Separate Color Layer: Create a new layer below the line art layer. This will be your color layer. Use the chosen coloring method (fill, airbrush, pen, etc.) to apply color within the line art boundaries.
- Utilizing Layer Masks: Add a layer mask to your color layer. This allows you to selectively hide or reveal portions of the color layer, offering precise control over color application and blending. For instance, you can use the layer mask to carefully refine the edges of a color fill or to create smooth transitions between colors.
Color Palette Creation for Animated Characters, Clip studio paint animation coloring
A well-defined color palette is essential for visual consistency and mood establishment. Consider the character’s personality, the story’s setting, and the desired emotional impact.
Example Palette: For a cheerful, playful character in a sunny setting, a palette might include:
- Base Color: A warm, light orange (#FFB347) – conveys warmth and happiness.
- Shadow Color: A slightly darker, desaturated orange (#E69138) – provides depth without losing the overall brightness.
- Highlight Color: A light yellow (#FFFFE0) – adds a touch of sparkle and emphasizes the character’s playful nature.
- Accent Color: A bright teal (#008080) – provides a contrasting pop of color, adding visual interest.
Workflow for Coloring a Short Animated Sequence
This table Artikels a workflow for coloring a short (5-10 frame) animated sequence, emphasizing efficiency.
| Step | Action | Tools Used | Notes |
|---|---|---|---|
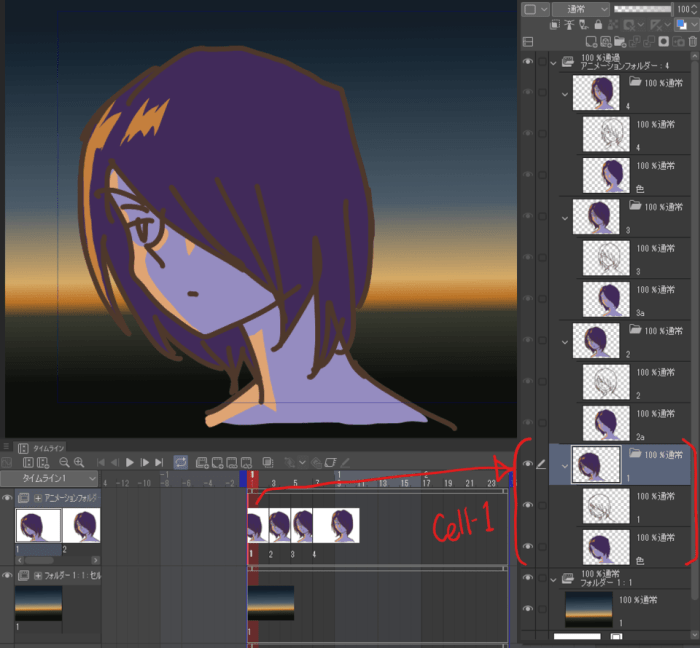
| 1 | Create line art layers for each frame. | Pen tool, Vector Layer | Maintain consistency across frames. |
| 2 | Create a base color layer below each line art layer. | Fill tool, Airbrush | Use the fill tool for large areas and the airbrush for softer transitions. |
| 3 | Add shading and highlighting layers. | Airbrush, Pen tool, Gradient Tool | Use layer masks for precise control. |
| 4 | Refine colors and adjust lighting. | Color adjustment layers (Hue/Saturation, Brightness/Contrast) | Ensure visual consistency across the sequence. |
| 5 | Export animation. | Clip Studio Paint’s animation export settings | Choose the appropriate format and resolution. |
Optimizing Color for Animation in Clip Studio Paint
Color is paramount in animation; it sets the mood, guides the eye, and breathes life into characters and environments. Mastering color in Clip Studio Paint is crucial for creating a visually compelling and consistent animated piece. This section delves into optimizing color management, transitions, and consistency for your animations.
Color Management in Clip Studio Paint
Consistent color across your animation workflow is essential. Clip Studio Paint offers robust color management tools. Using a consistent color profile (such as sRGB or Adobe RGB) throughout your project, from initial sketches to final render, prevents unexpected color shifts during rendering and export. Incorrect color profiles can lead to significant discrepancies between your monitor display and the final output, resulting in a less vibrant or even distorted final product.
For example, an animation intended for online viewing should consistently use the sRGB profile to ensure accurate color reproduction across different screens and devices. Failure to manage color profiles can result in colors appearing washed out, oversaturated, or completely different on various screens.
Creating Smooth Color Transitions and Gradients
Smooth color transitions are key to creating visually appealing animations. Clip Studio Paint’s Gradient tool allows for various gradient types (linear, radial, etc.), offering precise control over color shifts. Blending modes further enhance these transitions. For instance, using the “Overlay” blending mode on a gradient layer can subtly enhance the colors of the underlying artwork, creating a more luminous effect.
Imagine a sunrise scene: a radial gradient using warm oranges and yellows, set to “Overlay” over a landscape painting, can smoothly transition the colors and create a believable sunrise effect. Experimenting with different gradient types and blending modes allows for a vast array of stylistic choices, from subtle shifts to dramatic changes in color saturation and hue.
Maintaining Consistent Coloring Across Frames
Maintaining color consistency across multiple frames is vital for visual coherence. One effective technique is to create a base color palette early in the project and stick to it. Using color swatches or a dedicated color palette window in Clip Studio Paint helps maintain consistency. For complex animations with multiple scenes, consider using separate color palettes for different environments or moods.
For instance, a nighttime scene might utilize a cooler palette with darker blues and purples, while a daytime scene employs warmer tones with oranges and yellows. This approach ensures that each scene retains its unique atmospheric identity while maintaining an overall visual harmony.
Adjusting Color Balance and Vibrancy
Adjusting color balance and vibrancy enhances the overall mood and atmosphere. Clip Studio Paint offers various tools for this, including the Color Balance and Hue/Saturation/Luminosity adjustment layers. For a step-by-step guide:
1. Identify the target mood
Determine the desired mood for your scene (e.g., happy, melancholic, suspenseful).
2. Select adjustment layer
Add a “Color Balance” or “Hue/Saturation/Luminosity” adjustment layer above your animation layers.
3. Adjust parameters
For a warmer feel, increase the red and yellow values in Color Balance. For a cooler feel, increase the blue and cyan values. Adjust Hue, Saturation, and Luminosity to fine-tune the colors. Experiment with different settings until the desired effect is achieved.
4. Refine selectively
You can use masks to selectively apply these adjustments to specific areas of the frame. For example, you could use a mask to enhance the vibrancy of the character’s clothing while leaving the background relatively untouched.
5. Iterate and refine
Observe the impact of each adjustment on the overall scene and make further refinements as needed.For example, a scene intended to evoke a sense of serenity might benefit from slightly desaturated colors and a cool color temperature, while a high-action scene could use increased saturation and warmer tones to enhance the energy.
Advanced Coloring Techniques and Effects
Mastering advanced coloring techniques elevates your animations from simple to stunning. This section delves into the sophisticated tools and methods within Clip Studio Paint to achieve photorealistic lighting, expressive stylized effects, and intricate textural details, transforming your animated world. We’ll explore how layer modes, adjustment layers, brushes, and patterns can be combined to create truly captivating visuals.
Realistic Lighting Effects
Achieving realistic lighting involves a nuanced understanding of light’s interaction with surfaces. In Clip Studio Paint, this is accomplished through a combination of careful shadow and highlight placement, leveraging layer modes to blend light and shadow seamlessly. For example, to create a soft, diffused light source, you might use a large, soft-edged brush on a layer set to “Overlay” or “Soft Light” mode.
Conversely, hard shadows can be achieved using a hard-edged brush on a layer set to “Multiply” mode. Adjustment layers, such as Curves and Levels, provide fine-grained control over contrast, brightness, and color balance, further refining the lighting effects. For instance, a Curves adjustment layer can be used to subtly darken shadows and brighten highlights, adding depth and realism.
Careful consideration of the light source’s position and intensity is crucial for achieving believable results. The use of gradients can help create a smooth transition between light and shadow areas, preventing harsh edges and enhancing the realism of the lighting.
Stylized Coloring Effects
Clip Studio Paint offers a vast array of tools to create unique stylized coloring effects. Cel-shading, a popular technique in animation, involves using flat areas of color with strong Artikels to create a distinct, graphic look. This is easily achieved by using a hard brush for Artikels and fill tools for the color blocks. The line weight and color can be adjusted for various stylistic effects.
For a watercolor effect, you can utilize Clip Studio Paint’s watercolor brushes, experimenting with brush opacity and blending modes to create soft, translucent washes of color. The blending and layering of washes can simulate the natural flow and transparency of watercolor paints. Other artistic styles, such as painterly effects, can be achieved by utilizing custom brushes that mimic the texture and strokes of different painting media, such as oil paints or acrylics.
Experimentation with different brushes, layer modes, and blending techniques is key to finding the perfect style.
Adding Texture and Detail
Texture and detail significantly enhance the realism and visual appeal of animation. Clip Studio Paint provides a wealth of options for adding texture. Custom brushes, created with texture patterns or imported images, can be used to apply unique textures to surfaces. For example, a brush created from a high-resolution image of fabric can be used to add a realistic texture to clothing.
Patterns can also be used to add texture to larger areas, such as backgrounds. For instance, a brick pattern could be used to create a realistic brick wall background. The use of layer masks allows for precise control over where textures are applied, preventing unwanted texture overlap. Combining different texturing techniques can add depth and complexity, such as using a subtle grain texture overlaid on top of a base color to add a sense of realism.
Creating a Glowing Aura Special Effect
This tutorial Artikels the creation of a glowing aura effect.
- Step 1: Base Layer: Create a new layer and draw the character or object that will have the aura.
- Step 2: Aura Shape: Create a new layer above the base layer. Draw the shape of the aura using a soft brush. This could be a circle, an oval, or a more complex shape. Keep the edges soft.
- Step 3: Color Selection: Select a bright, glowing color for the aura.
- Step 4: Gradient Fill: Fill the aura shape with a radial gradient, starting with the brightest color in the center and fading to transparency at the edges. This creates a natural glow.
- Step 5: Gaussian Blur: Apply a Gaussian blur to the aura layer to soften the edges further and create a smoother glow.
- Step 6: Layer Modes: Experiment with different layer modes (e.g., “Add (Glow),” “Screen,” “Overlay”) to fine-tune the intensity and appearance of the glow.
- Step 7: Inner Glow: Optionally, create a new layer below the main aura layer and add a smaller, brighter aura using the same techniques. This adds depth to the effect.
- Step 8: Adjustments: Use adjustment layers (like Color Balance or Hue/Saturation) to fine-tune the color and brightness of the aura.


